The Rifle
- Marie Weaver
- Nov 23, 2023
- 3 min read

Updated: Nov 24, 2023
It all started with a birthday wish when I was 16. I always told my dad I wanted him to build a rifle for me. Now backstory... my dad has built many muzzleloaders. Keep in mind, I basically grew up on a range. At least once a month, my entire family (and sometimes even the dog) spent Sundays at the range for shoots. When I was little, my parents had a small shop out in the back yard and that's where my dad worked on guns. I remember sitting on the floor in the shop just watching him build rifles out of a block of wood.
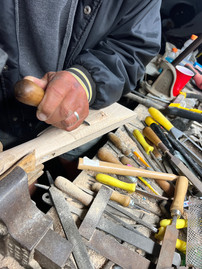
So several years ago, my dad started building my rifle! It's about an 1830's Pennsylvania Lancaster style percussion half stock long rifle in .45 caliber. He worked on it for quite some time, and decided about half way through to start over with another stock. Then life got in the way, keeping in mind my dad runs a business and I work full time, so we picked the project back up this year. My dad is teaching me how to build them now and giving me all of his gun building wisdom. We've worked on this rifle almost every day for about the last 6 weeks. So here's where we picked back up...


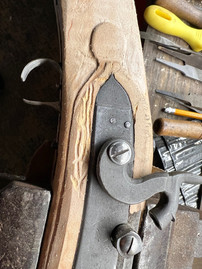
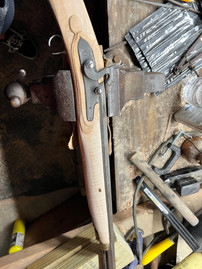
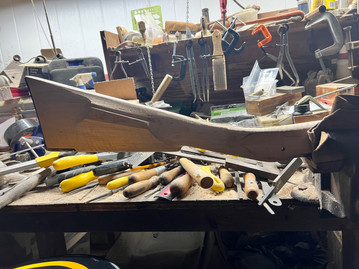
Now at this point, my dad had already done a decent amount of work on it. So over the last 6 weeks, working on it for 1-2 hours almost every night, we've drilled the tang bolt hole through the tang and the trigger, put in the wedge that holds the barrel in the stock, saudered on the rail and thimbles that hold the ramrod in place, drilled the pin hole for the thimble, completed the carvings for the lock and the side plate, and almost finished shaping the stock.
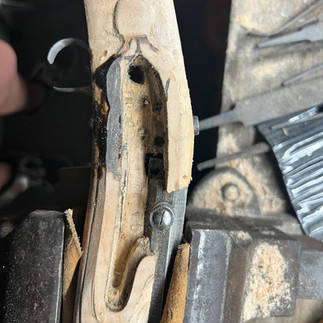
Now that doesn't sound like a lot when you list it out, but it's a lot of tedious work and we ran into some challenges along the way. The biggest challenge we encountered was powderpost beatle damage in the stock. I'll post a separate blog about this with more detail on ways to resolve/deal with it, but you can see here the damage from the powderpost larvae. How did we fix it? We mixed wood shavings from the stock with the stain we're going to use and a bit of epoxy and filled in the holes, let it harden overnight and sanded it down.


So that brings us to current. We have a few more weeks before we'll be completely done. Here's what we have left:
final shaping on the butt
final tweaking of the carving around the sideplate
Inlet the trigger guard, toe plate, side plate, wedge inlays, and patch box
Design and complete carvings on the butt and around the tang
Final sanding
Stain
Brown the barrel
Polish the brass fittings
Seal with boiled linseed oil
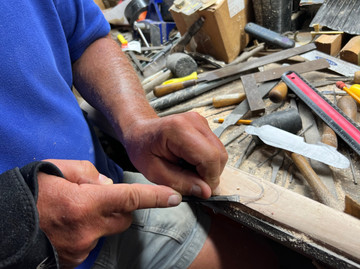
Here are some photos of our progress along the way.


Stay tuned.... I'll continue to post updates over the coming weeks of our progress and things I've learned along the way.
And in case you were wondering, yes, it really requires all those files and chisels. So. Many. Files.
Happy gunsmithing, folks.
"A master gunsmith is not a gunsmith that makes no mistakes but a gunsmith that knows how to hide his mistakes."
- my dad


Comments